Showing posts with label Beef. Show all posts

Friday, October 7, 2011

STEAK Lime Tacos With Spicy Grilled Corn Salsa. Muy Caliente!


If spicy dishes are not in your recipe line-up, then I suggest you read no further.

I'm sure there are some people who might think Jalapenos are not that spicy.

And that can be some-what true depending on your tongue's Scoville Heat Unit.

Scoville is the meter on which Hot Peppers are measured.

Kind of like the Richter Scale in reference to measuring an Earthquake.

So if we take a look at the scale below, Jalapenos are really not THAT hot.
Jalapenos are listed at 5,000 heat units compared to the Habanero pepper at a whopping 350,000.


So if you're up for some "heat units" in your life, then I think you'll really like this.

Personally, I love the combination of the crisp cool texture of the grilled sweet corn, along with the spicy bits of Jalapeno, and the citrus taste of the Lime.

This dish has my name written all over it.

Hubby....not so crazy about it.

Me......LOVE IT.


2 lbs (give or take) of Flank Steak
Kosher Salt
Steak Seasoning of your choice
2 Limes (I know there are 3 in the photo.  I always over buy)
1 (16 ounce) bag of frozen sweet corn
1/2 small onion diced
1/4 c. of diced Jalapenos from a can
2 Tbsp. sour cream
2 Tbsp. Olive Oil or regular Vegetable Oil
Flour Tortillas

Lay your Flank Steak on a foiled lined roasting pan and sprinkle it with Kosher Salt.  My grocery only had small cuts, so I had to buy two cuts of Flank Steak, each were at a little over a pound.


Now sprinkle the steak with some sort of steak seasoning.  I happened to have BEORKIN Seasoning in the cabinet so I used that.


Get it?  Beorkin.  Beef, Pork, Chicken.  Clever, very clever.

I'm sure any steak type seasoning will do.  Monteral Steak Seasoning is a really good one too.

I think they all pretty much have the same ingredients.


Sprinkle your flank steak with your steak seasoning and set aside.

These are about how big the pieces of Flank Steak I like to get.


While the steak rests with the seasonings, lets get the corn salsa ready.

Dice up 1/2 half of a small onion into small pieces.  Set aside.

Get out a pan, and on medium high heat, heat up 2 tablespoons of olive oil.  Regular vegetable oil is ok too.  Let the oil heat up for about 2 minutes then carefully place your corn in the hot oil.

Be sure to use a big enough pan, so your corn isn't all crowded.

Keep tossing and turning the corn in the hot oil until it's all grilled looking, and a tad brownish.  This gets it all sweet and crunchy.

Once the corn is done, toss it into a large bowl.


Now in the same pan, add the onions, and cook until tender.  Adding a tad more oil if need be.

Once they are done, toss in with the corn.


Open your can of diced Jalapenos and add 1/4 cup into the corn onion mixture.


Toss together and now add the 2 Tbsp. of sour cream.

Combine all together and place the corn mixture in the refrigerator.

Ok, back to the steak.  Turn your oven broiler on and make sure your rack is sitting on the top position.

Once broiler is heated up and ready to go, place in your flank steak in the oven.

If you have the size flank steak that I've shown in the photos above, you're going to broil the steak for about 5 minutes on each side.

Attention Por Favor - Flank Steak needs to be cooked only until pink in the middle.  That's why 5 minutes on each side should be plenty enough cooking time.  Any longer will result in tough steak.

Broil the first 5 minutes, then carefully flip over for another five minutes.

They should pretty much look like this when finished.


Next step is Muy Importante.  That means "very important" in steak taco language.

Let the steak sit and don't touch them for about 10 minutes.

They need a little Siesta so-to-speak.

Let them rest, so all the juices fall into place.

While your steak is having a little nap, go ahead and get out your limes and cut them into wedges.

Now is the time to warm up your tortillas if you like them warm.

After the steak has rested, get out a nice serrated knife.


Slice your steak against the grain in thin strips.
Once sliced, lay steak pieces on a warm tortilla.  Top with the cooled spicy corn salsa.

Squeeze one lime slice over the top.


 Cool, crisp, sweet corn with 5,000 Scoville units of Zest.

OLE!


Saturday, March 5, 2011

Wagon Trail - BBQ BEEF BRISKET


The word "Brisket" always reminds me of the Old West.

Campfires, Wagon Trails and Gunsmoke.

Men sitting around a roaring fire with bandanas around their necks, horses tied up behind em', wearing Levis and dusty old boots- eating chunks of Brisket.


Sometimes there's nothing better than a good slice of meat and potatoes.

This recipe will make any Cowboy wanna stick around the Ranch if he smells this cooking in the oven.

5 to 6 pound Brisket, trimmed
1 (12 ounce) can beer
1 packed Meatloaf Seasoning
Apple Cider
1/2 Onion, sliced
BBQ Sauce


Buy yourself a nice 5 or 6 pound of trimmed brisket. Normally you will find a "non-trimmed" Brisket or a "trimmed" Brisket in your grocer. Be sure to get the trimmed kind.  Don't skimp and get a smaller cut because Brisket shrinks up to half the size.

Preheat oven to 375 degrees.

Place your Brisket in a deep roasting pan, fat side down, and sprinkle it with salt and pepper and then sprinkle with the Meatloaf seasoning packet.


Pour the beer in the the bottom of the roasting pan.


Pour enough of the apple cider in the pan to cover half the Brisket.


Cut half of an onion and place onion rings right on top of the Brisket.

Cover the pan tightly with foil place in preheated oven.

Go sit a spell and let the Brisket hang out in the oven for 3.5 hours.

After the 3.5 hours is up, take out of the oven.  Take Brisket out of roasting pan and place on a cookie sheet lined with tin foil.

Turn oven down to 350.


Pour 1/3 of the bottle of BBQ sauce top of the Brisket and brush it all over the top.


Place it back in the oven, uncovered for 15 minutes.

Repeat. (Take out of the oven again, pour 1/3 of the bottle on top of the Brisket, brush over the top,  and place back in the oven for 15 more minutes).

Repeat one more time.

Take out of oven and let rest for 15 minutes.

The BBQ sauce will be all warm, and sticky and gooey and delicious.


Now get to slicing, your hungry Cowboy is waiting.


Yee Haw!


Saturday, February 5, 2011

MAN CAVE Bacon Cheeseburger Pizza Roll


Man Cave. 

Definition:
Man Cave, sometimes called Man Space or Man Sanctuary - is a place where guys can "do as they please" without fear of upsetting any female in regards to house rules or decor design.

Man Caves are a place to be away from women.  To indulge in childish hobbies. To hang out with male friends.

A place to retreat -  to watch sports, play Poker, or in my husband's case, to sing Karaoke and pretend he's the lead singer of Styx.

A Man Cave can present a guy with an "opportunity to disappear for hours without leaving the premises".


Wifely Instructions:
Make this recipe, open the Man Cave door ever so slightly, quickly stick your arm inside, and carefully hand your hungry Caveman and his friends this delicious Bacon Cheeseburger Pizza Roll.

He will thank you.

His Caveman friends will thank you.

And this will give you 2 additional hours of peace and quiet to take a bath, read a book, watch a girly movie, and to have the Wife Cave all to yourself.


1 lb. lean ground beef
5 slices bacon, cooked and crumbled
1/2 c. chopped onion, chopped in small pieces
8 ounces (1/2 lb.) Velveeta  Cheese, cut into cubes
1 roll (13.8 ounces) Refrigerated Pizza Crust

Must Have Side Items:


Ketchup
Mustard
Claussen Refrigerated Kosher Dill Sandwich Pickles
Preheat oven to 400 degrees.


Fry bacon slices and crumble.  Set aside.


Fry hamburger and onion together.  Once hamburger is done, drain, return meat and onion to pan.  Add bacon and Velveeta cubes.  Heat until cheese is melted, stirring often. Once cheese is melted, and combined with meat mixture, take off burner and set aside.

Take large cookie sheet and spray it with Pam.


Unroll refrigerated pizza roll and gently press out to create a 15 x 8 inch rectangle. I use my 1/2 sheet, or Jelly Roll pan.  Gently push the dough out to the sides.


Top dough, evenly with meat mixture, trying to spread the meat out all the way to the edges.


Roll up the dough, starting from the long end and roll carefully with both hands, into a log.


Make sure seam side is down, and any holes that might have torn in the dough, be sure to pinch them together.

Bake in preheated 400 degree oven for 20 minutes until golden brown.  Be sure to start watching, after 18 minutes, as ovens really do vary.  That's what the oven window is for.


Cut into 6 slices.


Serve each slice on a plate, with a squirt of Ketchup and Mustard for dipping, as well as a Claussen pickle for the crunch factor. (Personally I love the cool crisp snap of the pickle after each bite).


Note:  These slices are to be eaten with your hands.  Do not hand out forks or knives. Forks are for women and children.
Cavemen use their hands, and they are to be picked up, and dunked into the mustard and ketchup before each bite. 


Purple nail polish in photo above does not belong to my Caveman. According to the rules and regulations of Cave Man handbook, article C, section 2; "Nail polish of any kind is strictly prohibited to anyone that enters the cave".

Sunday, January 30, 2011

I Love You Chuck! Never Fail Roast Beef Sandwiches


I love Chuck.

He's always so tender.

Forgiving.

He never disappoints.

He never fails me.

He's so versatile

Oh, and he's oh-so juicy.

My husband knows all about Chuck so don't worry.

I'm talking about my lover, Chuck Roast.

To me, Chuck Roast is the best all-round cut of beef.

So many uses.  My gosh this dude is so versatile.

Today I made Roast Beef sandwiches, or Beef Dip Sandwiches.

Call it what you like, top it with what you like, Chuck will never fail you.


3 to 4 pound Boneless Chuck Roast
3/4 stick butter
1/2 large yellow onion, cut into chunks (you can use the whole onion if desired)
32 ounce container Beef Broth
3 Tbsp. Worcestershire Sauce
Kosher Salt

Sandwich Stuff:
(This of course will be to your liking)
Deli Buns, toasted (see below)
I like Horseradish or A-1
Hubby likes regular ole Yellow Mustard
Some like the juice of the broth to dip with
Sliced Provolone or Monterrey Jack cheese (to your liking of course)
Pickle Spear

Click Here For A PRINTABLE RECIPE!

I kind of think the simpler the better, cause Chuck is so tender and juicy, you really don't too much to cover up all his goodness.

Ok, back to Chuck. Get yourself a nice cut of Chuck Roast, with a medium amount of fat.  Not too lean, and not to fatty.
Most grocery stores will have them already cut into 3 to 4 pound roasts, which is perfect for about 6 very hearty sandwiches.

Just in case you have never seen Chuck before, this is what the label should say.  He's very popular and so well liked, so you should not have a hard time finding him.


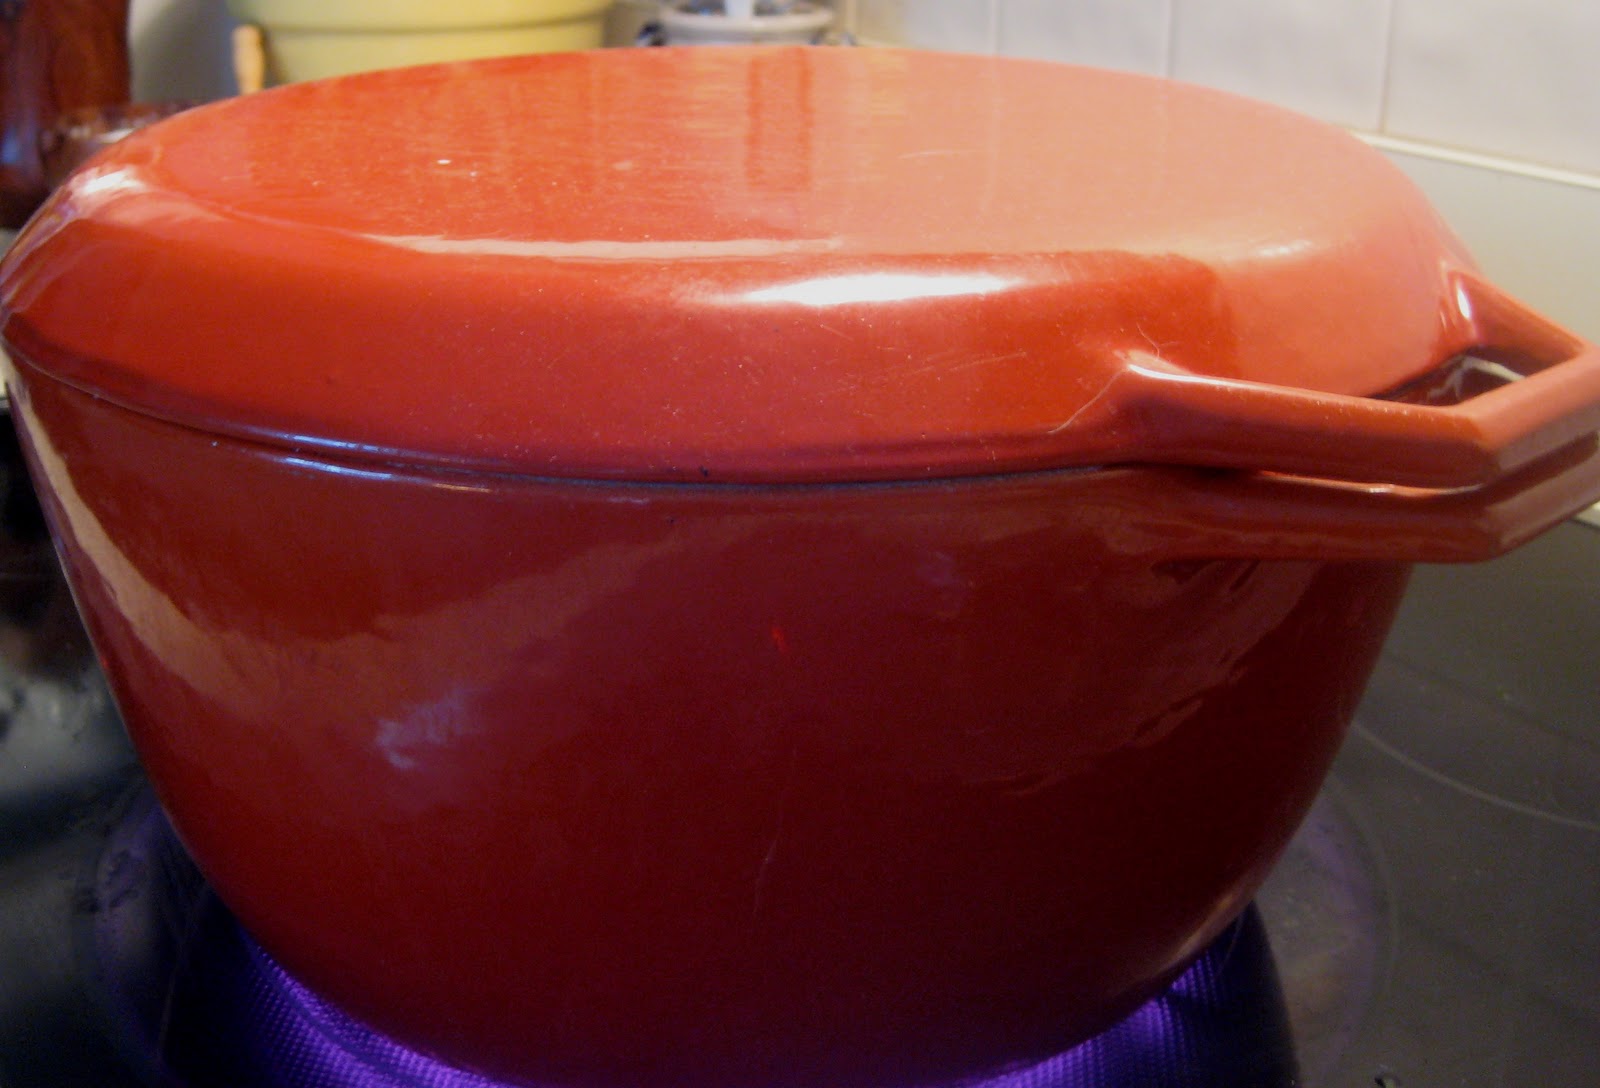
Get out your big pot.  I have one of those Le Creuset "type" cast iron pots.  It's basically a "mock" version of Le Creuset.  Those darn things are expensive with a capital E, so I just bought one that's a pretend version.  Works perfectly, but without the designer name on the lid.

Turn your heat up to medium high and throw in your butter and your chopped up onion.  Feel free to use the whole onion.  I just use half because if my hubby's home at this step in the recipe, he walks in and says "It sure smells alliaceous in here!"  He thinks he's such a smarty pants using big words. So I cut it back to just 1/2 an onion cause I'm nice that way, but a whole one is wonderful

No need to make the onion pretty, and be sure to leave it in somewhat bigger chunks.

Get the butter all melty and swirl around your onions in the melted butter and cook on medium high for about 3 minutes.


Now gently lay Chuck right on top of the melted butter and onion mixture. 


Pour in the entire box of Beef Broth.


Now pour in the Worcestershire sauce, and pop the lid on your pot, and turn down your stove to the number #2.


Now just walk away...... and, as they say in Brooklyn and New Jersey.......Forget about it.

This will take about 4 to 5 hours.  So go ahead and putter around the house, answer your emails, do some laundry.

But I'm warning you, if you leave the house to run some errands.  Be prepared!

When you walk back in your house, now is the time you will fall totally, utterly and completely in love with Chuck.

Your house will smell like..... like.....well, like.......LOVE.

And if your boyfriend or husband is home, watch out, cause your man will want to marry you or re-marry you, all because of the smell of Chuck.

After about 4 to 5  hours on the number 2 low setting on your stove, you can feel free to lift the lid and check on chuck, he should pretty much be done.

When you take your tongs and try to pull him out, he will just start to fall apart.  If it seems a bit "together" still, then let him cook another 30 minutes.  I have found that 4 1/2 hours is perfect, but then again, it depends on the size roast you bought and how well your pot keeps its heat.

Once Chuck is ready, grab a nice casserole dish and slowly take chuck out and place in the dish.  You will probably have to keep going back to pull out hunks, cause Chuck is so tender, he's liable to fall into pieces.

He's going to look something like this:


Oh Chuck, I love you.  Look at how handsome you are.

Let Chuck sit in the casserole dish and rest for a bit, he's liable to be pretty hot.  After about 3 to 5 minutes, take two forks and gently pull the roast apart.


This is the time you might want to discard any of the fatty pieces.  Totally up to you though.

Once all the roast has been pulled apart with your fork, take some Kosher salt and gently sprinkle, then toss, and then sprinkle and toss.  Just brings out the flavor and makes Chuck even more appealing.

Once it's all pulled apart, and the salt has been added.  Take your ladle and pour some of the juice from the pan on top.  Get some of those onion pieces too that are floating around.


I like to get about three good ladles full and pour it all over Chuck. 

You can save the rest of the juice to heat up and serve on the side for dipping if you wish.

Now is the time where my mind starts to wander.

Chuck, you are so diverse.  Just think of all the things I could do with you right now.

I could just serve you as is, with a big pile of Garlic Mashed Potatoes.

Or I could cover you in BBQ sauce and pile you high on a bun and serve you with BBQ beans

I could put you into a warm tortilla and have beef tacos.

But today, I'm going to put you on a toasted deli roll.

Turn your oven up to 350.

Now butter the tops of your buns.


Place your buns on a cookie sheet (how ever many sandwiches you are making) and place in the oven for about 4 minutes.  You just want them to start to get toasty.

Once you see the corners of the buns starting to toast, turn on your broiler.

Watch them really careful, cause toasting can happen pretty quickly.

They should be nice and toasty like this when ready to come out.  Turn your oven off at this point.


Now is the time you can get creative.

I just put a bit of horseradish on my bread, and then sprinkled a bit of provolone on top, and popped it back in the oven for just enough time to get the cheese all melty.


However you serve Chuck, it will be love at first bite.

Why Chuck, I bet you say that to all the girls.